News
2 May 2018

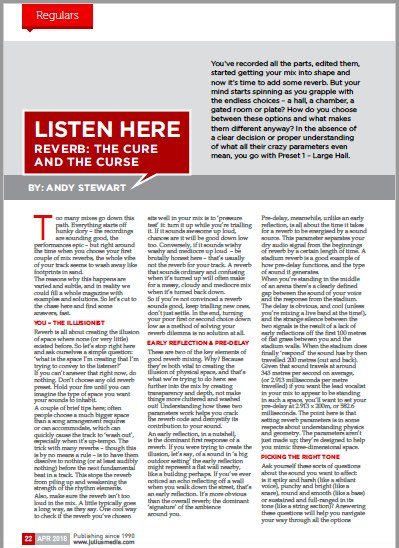
Reverb: The Cure and the Curse
Subscribe to CX E-News
REGULARS – LISTEN HERE
You’ve recorded all the parts, edited them, started getting your mix into shape and now it’s time to add some reverb. But your mind starts spinning as you grapple with the endless choices – a hall, a chamber, a gated room or plate? How do you choose between these options and what makes them different anyway? In the absence of a clear decision or proper understanding of what all their crazy parameters even mean, you go with Preset 1 – Large Hall.
Reverb: The Cure and the Curse
By Andy Stewart.


Too many mixes go down this path. Everything starts off hunky dory – the recordings are sounding good, the performances epic – but right around the time when you choose your first couple of mix reverbs, the whole vibe of your track seems to wash away like footprints in sand.
The reasons why this happens are varied and subtle, and in reality we could fill a whole magazine with examples and solutions. So let’s cut to the chase here and find some answers, fast.
YOU – THE ILLUSIONIST
Reverb is all about creating the illusion of space where none (or very little) existed before. So let’s stop right here and ask ourselves a simple question: ‘what is the space I’m creating that I’m trying to convey to the listener?’

If you can’t answer that right now, do nothing. Don’t choose any old reverb preset. Hold your fire until you can imagine the type of space you want your sounds to inhabit. A couple of brief tips here; often people choose a much bigger space than a song arrangement requires or can accommodate, which can quickly cause the track to ‘wash out’, especially when it’s up-tempo.
The trick with many reverbs – though this is by no means a rule – is to have them dissolve to nothing (or at least audibly nothing) before the next fundamental beat in a track. This stops the reverb from piling up and weakening the strength of the rhythm elements. Also, make sure the reverb isn’t too loud in the mix. A little typically goes a long way, as they say.
One cool way to check if the reverb you’ve chosen sits well in your mix is to ‘pressure test’ it: turn it up while you’re trialing it. If it sounds awesome up loud, chances are it will be good down low too. Conversely, if it sounds wishy-washy and mediocre up loud – be brutally honest here – that’s usually not the reverb for your track. A reverb that sounds ordinary and confusing when it’s turned up will often make for a messy, cloudy and mediocre mix when it’s turned back down.
So if you’re not convinced a reverb sounds good, keep trialling new ones, don’t just settle. In the end, turning your poor first or second choice down low as a method of solving your reverb dilemma is no solution at all.
EARLY REFLECTION & PRE-DELAY
These are two of the key elements of good reverb mixing. Why? Because they’re both vital to creating the illusion of physical space, and that’s what we’re trying to do here: see further into the mix by creating transparency and depth, not make things more cluttered and washed out!
Understanding how these two parameters work helps you crack the reverb code and demystify its contribution to your sound. An early reflection, in a nutshell, is the dominant first response of a reverb. If you were trying to create the illusion, let’s say, of a sound in ‘a big outdoor setting’ the early reflection might represent a flat wall nearby, like a building perhaps. If you’ve ever noticed an echo reflecting off a wall when you walk down the street, that’s an early reflection.
It’s more obvious than the overall reverb; the dominant ‘signature’ of the ambience around you. Pre-delay, meanwhile, unlike an early reflection, is all about the time it takes for a reverb to be energised by a sound source. This parameter separates your dry audio signal from the beginnings of reverb by a certain length of time.
A stadium reverb is a good example of how pre-delay functions, and the type of sound it generates. When you’re standing in the middle of an arena there’s a clearly defined gap between the sound of your voice and the response from the stadium. The delay is obvious, and cool (unless you’re mixing a live band at the time!), and the strange silence between the two signals is the result of a lack of early reflections off the first 100 metres of flat grass between you and the stadium walls.
When the stadium does finally ‘respond’ the sound has by then travelled 200 metres (out and back). Given that sound travels at around 343 metres per second on average, (or 2.913 milliseconds per metre travelled) if you want the lead vocalist in your mix to appear to be standing in such a space, you’ll want to set your pre-delay at 2.913 x 200m, or 582.6 milliseconds.
The point here is that setting reverb parameters is in some respects about understanding physics and geometry. The parameters aren’t just made up; they’re designed to help you mimic three-dimensional space.
PICKING THE RIGHT TONE
Ask yourself these sorts of questions about the sound you want to affect: is it spiky and harsh (like a sibilant voice), punchy and bright (like a snare), round and smooth (like a bass) or sustained and full-ranged in its tone (like a string section)?Answering these questions will help you navigate your way through all the options towards the reverb you require.
A long, dark reverb, for instance, might wash out your mix long before a bass guitar energises it. By the time you do eventually hear it in the mix, the reverb will have swamped the track with a tidal wave of sub-harmonics! So too a sibilant voice might only sound worse when patched across a bright hall reverb. Maybe the bass would be better suited to this sort of reverb instead, and vice versa.
In most situations (though not always) when you add reverb you’re trying to emphasise the sense of space without necessarily exacerbating an instrument’s most sensitive or obnoxious characteristics.
DUCKS & GATES
Two other quick tips. Gates can be powerful if you really want a big sound without things getting too messy. Set up the right way, gates allow you to hear more reverb before cutting off (slowly or dramatically) to accommodate the next beat or sound in your mix.
In short, gates are your friend, but if used overtly, expect your mix to start sounding quite ’80s.
Ducking and side-chaining reverbs by allowing other instruments to influence the tail’s shape can be a cool effect too. If a reverb is long, for instance – and you like that – but at times it masks another sound, use that other instrument to duck the reverb. That way the reverb tail won’t be so linear in its decay, but rather have steps or holes punched into it. The best way to do this is with the key input of your reverb units, common to hardware and software effects alike.
LUCKY LAST
Four last quick-fire tips: the closer you want an instrument or voice to seem in your mix, and the bigger your soundstage, the larger the pre-delay value of the closest object needs to be for the illusion to be convincing. As things move further back in your mix, they should get a bit wetter overall, but the pre-delay shorter.
Things right at the back should be wettest and have essentially no pre-delay, because the reverb and source should theoretically arrive together, or at least this would be typical of physical three-dimensional space. If you’re reverbs are too fizzy, try putting a de-esser across the aux send before the reverb unit. You might like the tonal space of the reverb overall but not its response to bright, transient signals. Knock these on the head on their way to the unit.
Another tip about a reverb’s size: what sort of space would you record in if the song you’re mixing had to be recorded all at once by a band? Would you really record in a big hall or stadium then? Imagining the preferred recording space can sometimes be a good first visual cue for the type of reverb that will suit your track.
And finally, as a mix develops some of your early reverb choices might become unsuitable. Keep pressure testing them to be sure they’re still okay.
That’s it, I’m out of… space.
Andy Stewart owns and operates The Mill in the hills of Bass Coast in Victoria. He’s happy to respond to any pleas for recording or mixing help… Contact him at: andy@themillstudio.com.au
This article first appeared in the print edition of CX Magazine April 2018, pp.22-23. CX Magazine is Australia and New Zealand’s only publication dedicated to entertainment technology news and issues. Read all editions for free or search our archive www.cxnetwork.com.au
© CX Media
Subscribe
Published monthly since 1991, our famous AV industry magazine is free for download or pay for print. Subscribers also receive CX News, our free weekly email with the latest industry news and jobs.
Recent posts