News
27 Sep 2018

How To: Sennheiser Ambeo VR Microphone
Subscribe to CX E-News
How To
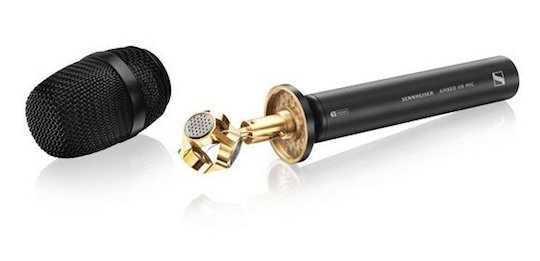
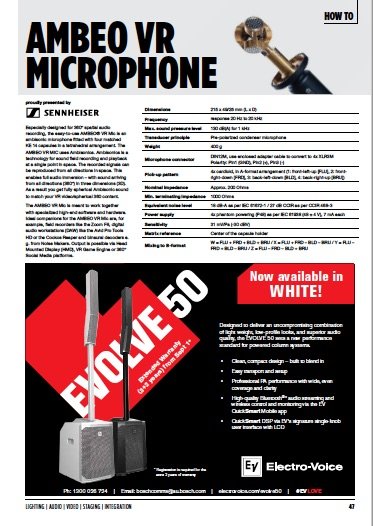
AMBEO VR Microphone
Proudly presented by

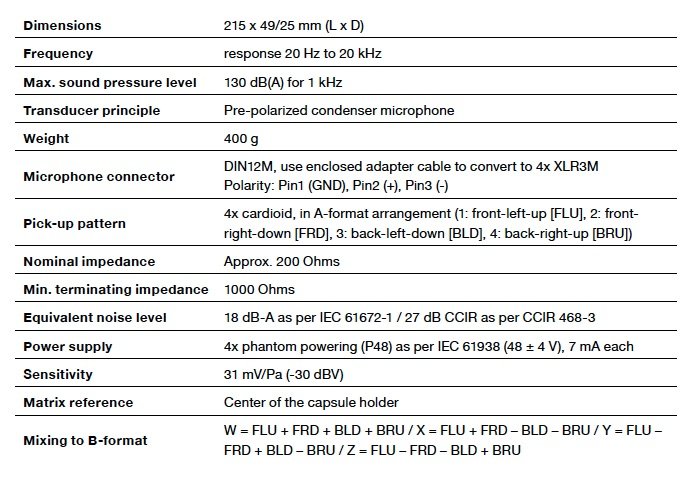
Especially designed for 360° spatial audio recording, the easy-to-use AMBEO® VR Mic is an ambisonic microphone fitted with four matched KE 14 capsules in a tetrahedral arrangement.
The AMBEO VR MIC uses Ambisonics. Ambisonics is a technology for sound field recording and playback at a single point in space. The recorded signals can be reproduced from all directions in space. This enables full audio immersion – with sound arriving from all directions (360°) in three dimensions (3D). As a result you get fully spherical Ambisonic sound to match your VR video/spherical 360 content.
The AMBEO VR Mic is meant to work together with specialized high-end software and hardware. Ideal companions for the AMBEO VR Mic are, for example, field recorders like the Zoom F8, digital audio workstations (DAW) like the Avid Pro Tools HD or the Cockos Reaper and binaural decoders e. g. from Noise Makers.


Output is possible via Head Mounted Display (HMD), VR Game Engine or 360° Social Media platforms.
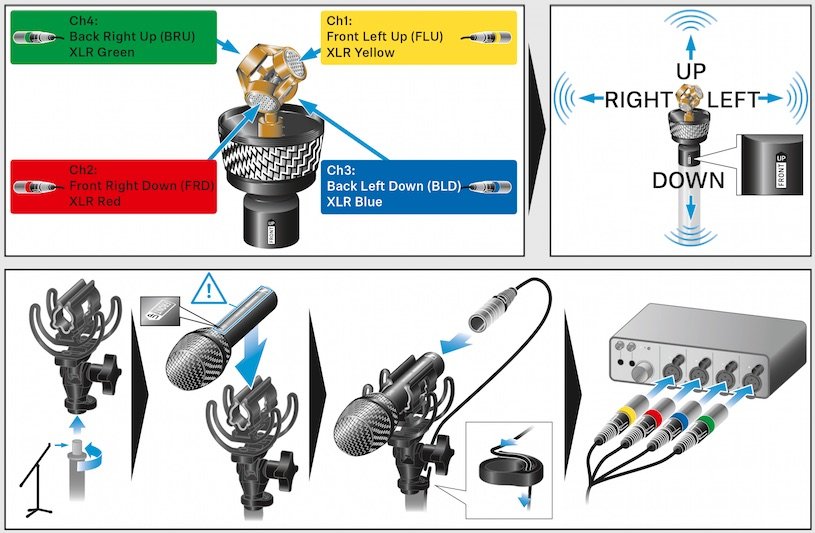
1. Setup
Microphone output is in the form of a 12 pin connector on the end of an extension cable that terminates in a splitter with 4 numbered & colour coded XLR outputs, one for each of the KE 14 capsules – the Ambisonics A Format. The field recorder needs to have a minimum of four channels to accommodate each of the mic capsules and be able to deliver phantom power to all 4 inputs. Connect the XLR’s in the correct order – cable one to input one, two to two etc.
Setup Gain Link – assigning all four channels to master gain control. This ensures equal gain control over all four channels creating the correct sound sphere.

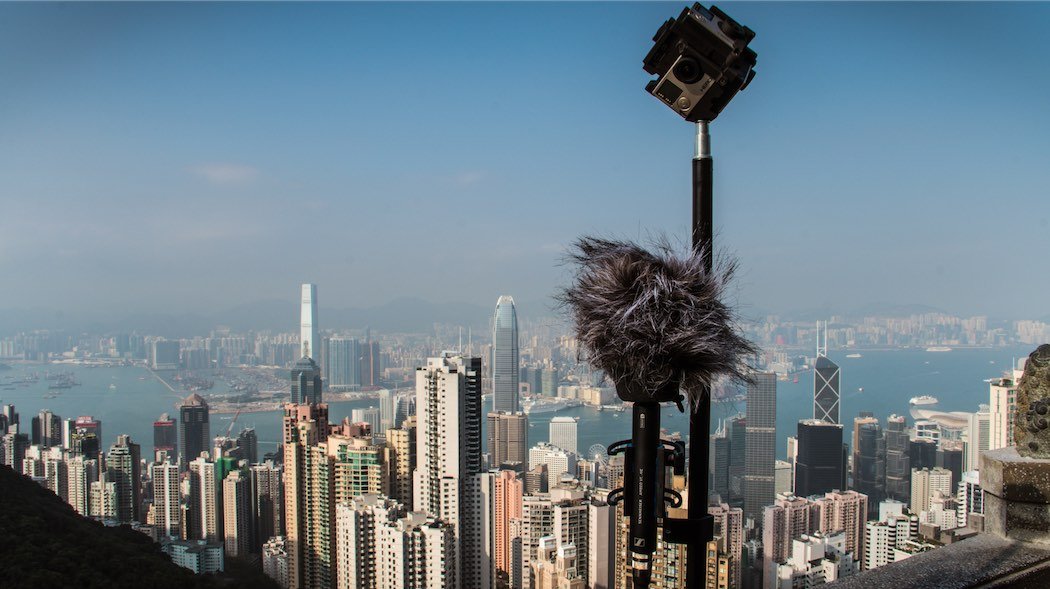
2. On Set Microphone Placement
The 3D sound field is captured spherically from the point in the sound field where the VR Mic is positioned. When used together with a 360° camera rig, the VR Mic should be mounted as coincident as possible with it. Align the “Front” marking on the VR Mic with the intended front of the 360 camera.
In VR recording, the mic will be recorded in the video footage and needs to be positioned at a point where it can be edited out in a way that will not disrupt the video content.
Set recorder level to where it’s peaking at around -12dB, maximum -6 dB. Sound recorder should be placed as close as possible to the camera.
3. Converting the recording to B Format
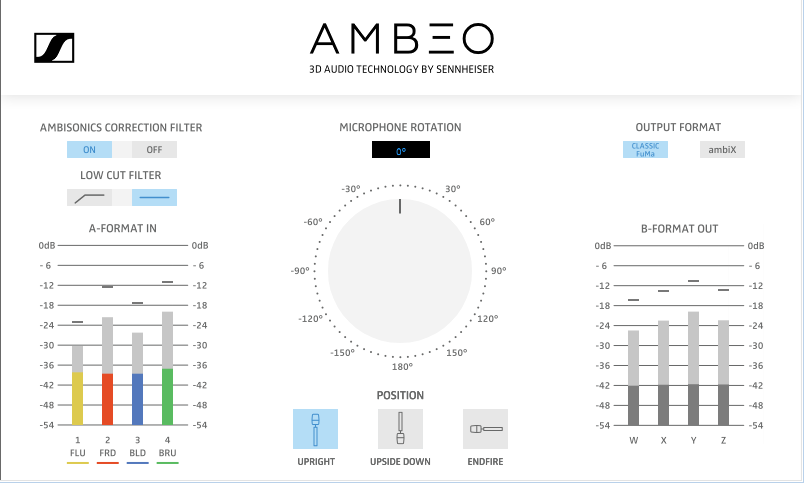
Minimum requirement is a work station that is able to handle a 4 channel buss structure. You need to load the Sennheiser AMBEO plug in that converts Ambisonics’ A-format from the microphone to Ambisonics’ B-format.
Plugin is available here: https://en-au.sennheiser.com/ambeo-blueprints-downloads
The plug-in can be used intuitively. It allows you to use filters, define the position and orientation of the mic rophone and to adjust the output format. On the output of the AMBEO A-B format converter you can choose between “Classic FuMa” and “ambiX”. The differences are in the Ambisonics channel ordering and levels. Which one to choose is dependent on the workflow and possibly other signals and/or tools in Ambisonics, which all need to be in the same format.
For upload to YouTube 360, always choose “ambiX” to be compliant with the spatial audio processing done in the browser.
4. Mixing
Now that we have loaded our 360° video and AMBEO VR audio into our digital workstation, we may want to mix in additional mic recordings, say for example a couple of presenter lapel microphones.
Additional sounds recorded with Lavalier or other spot mics need to be spatialised in Post Production which can be done with tools like the FB360 Spatialiser Plugin available as a free download from here: https://facebook360.fb.com/spatial-workstation
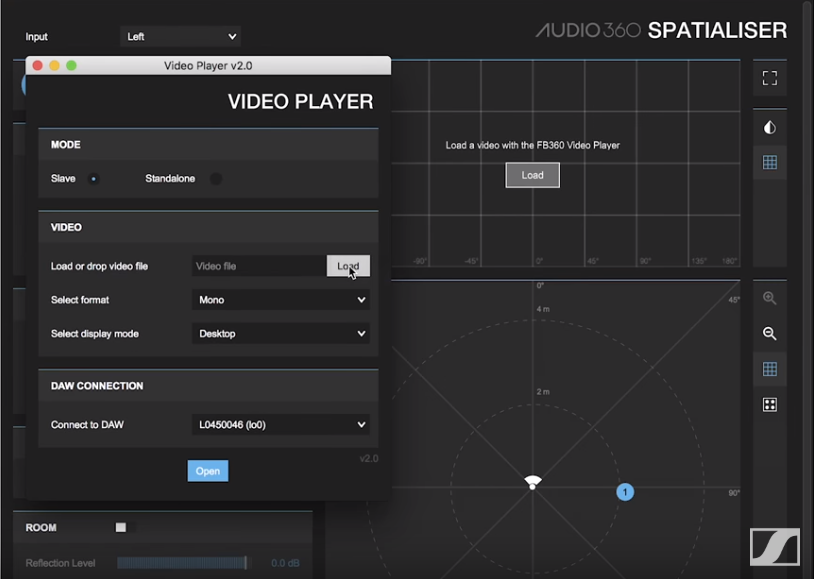
The Facebook 360 Spatial Workstation is a software suite for designing spatial audio for 360 video and cinematic VR. It includes plugins for popular audio workstations, a time synchronized 360 video player and utilities to help design and publish spatial audio in a variety of formats.
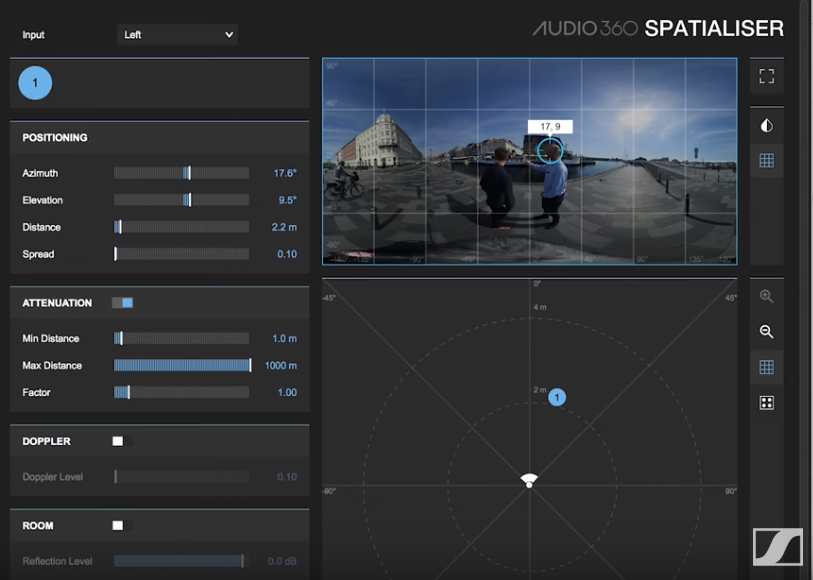
Load the Facebook 360 Spatialiser and then open and load the recorded 360 video (A.) The equirectangular grid depicts the entire 360 video which is then used to position the audio recordings from the lapel microphones (B.)
Set the DAW automation mode to latch, unlike conventional stereo recordings where panning is left/right, this will position the audio into the 360 sound sphere. The audio recording can then be positioned in line with the presenter. This needs to be done in real time for all mono sound sources.
5. Delivering
First step is to disable the binaural decoder that was used to monitor the recording in F360 Control, otherwise we won’t have the full 360 soundsphere. Next step is to render our FB360 master track as a poly wav file, reload the master video and encode the rendered audio file. Your 3D audio encoded 360 video masterpiece is now ready to show the world!
If you are interested in getting familiar with the production workflow, a sample Reaper session can be downloaded here: https://en-au.sennheiser.com/microphone-3d-audio-ambeo-vr-mic
This article first appeared in the September 2018 edition of CX Magazine – in print and online. CX Magazine is Australia and New Zealand’s only publication dedicated to entertainment technology news and issues. Read all editions for free or search our archive www.cxnetwork.com.au
© CX Media
Subscribe
Published monthly since 1991, our famous AV industry magazine is free for download or pay for print. Subscribers also receive CX News, our free weekly email with the latest industry news and jobs.
Recent posts