News
27 Jun 2018

How To: Configure an Acoustic Echo Cancellation reference with ClearOne ConvergePro2
Subscribe to CX E-News
How To
Configure an Acoustic Echo Cancellation reference with ClearOne ConvergePro2
Proudly presented by

ClearOne ConvergePro2 units are devices and software designed specifically for premium auto-mixing, microphone management and AEC for the conferencing professional. The environment is optimised for the 99% of use cases where microphone systems are used in conjunction with native Skype for Business, VOIP, Video Codecs or another form of conferencing to the far end, and the software is configured in a matter of minutes due to its closed architecture layout.
However, when the microphones are required to be both broadcast to the far end, and used in the room for local speech reinforcement, this produces a conundrum for the AEC engine which is designed specifically to eliminate audio from certain paths. In the ClearOne Converge Architecture, this is easily dealt with by using a “Custom AEC Reference”
Here are the basic guidelines for configuring a simple Acoustic Echo Cancellation (AEC) reference for ClearOne ConvergePro2, when the in-room Beamformer microphone is used in conjunction with Table Microphones – but these table microphones are required to be used for both Far End conference calls and in-room sound reinforcement. This scenario causes real problems for effective AEC, but dealt with very easily in the ClearOne Converge.


Creating an AEC Reference
On a ConvergePro2 unit, you must first create either a standard reference or a custom reference as a network resource.
1. Load or create a site file offline. If you are currently connected to the stack you must first disconnect, and then load the site file into the Converge Console software.
2. Go to Resource & Partition Mgt.
3. Make certain you have added a Line Output or a Speaker Output as a resource.
4. Click the arrow beside your main amplifier/speaker output to open it.
5. Click either the Add Standard button or the Add Custom button.
See Figure 1.
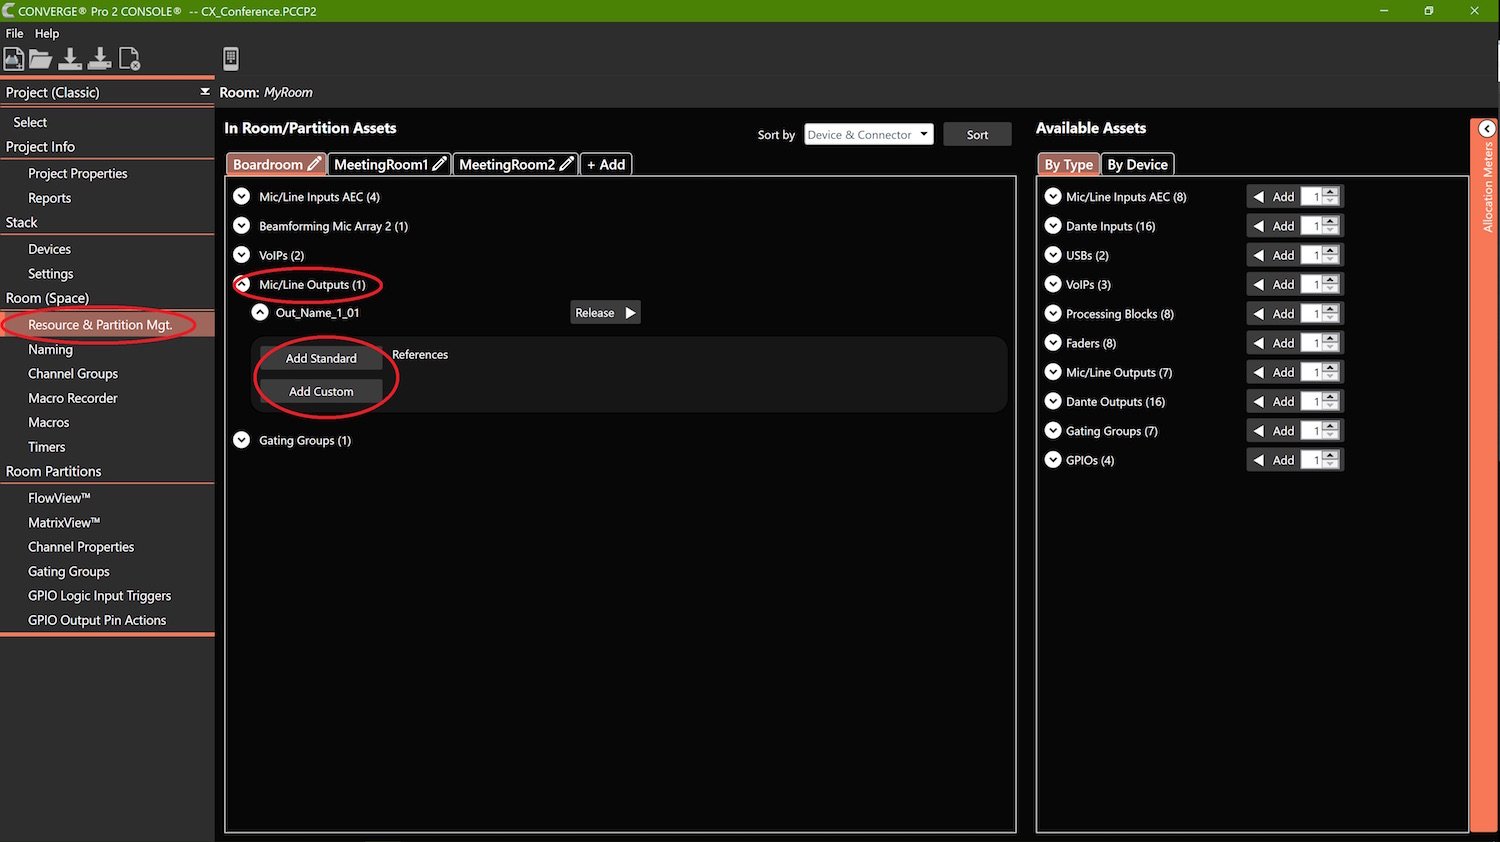
Figure 1
Configure a Standard Reference
A microphone can use a Standard Reference when its audio is not routed to this output, i.e. when the mic is not being reinforced into the same room for voice lift.

1. Go to the MatrixView. Select the tab Reference Matrix.
2. Add an arrow for each microphone that will need to use this AEC reference.
See Figure 2.
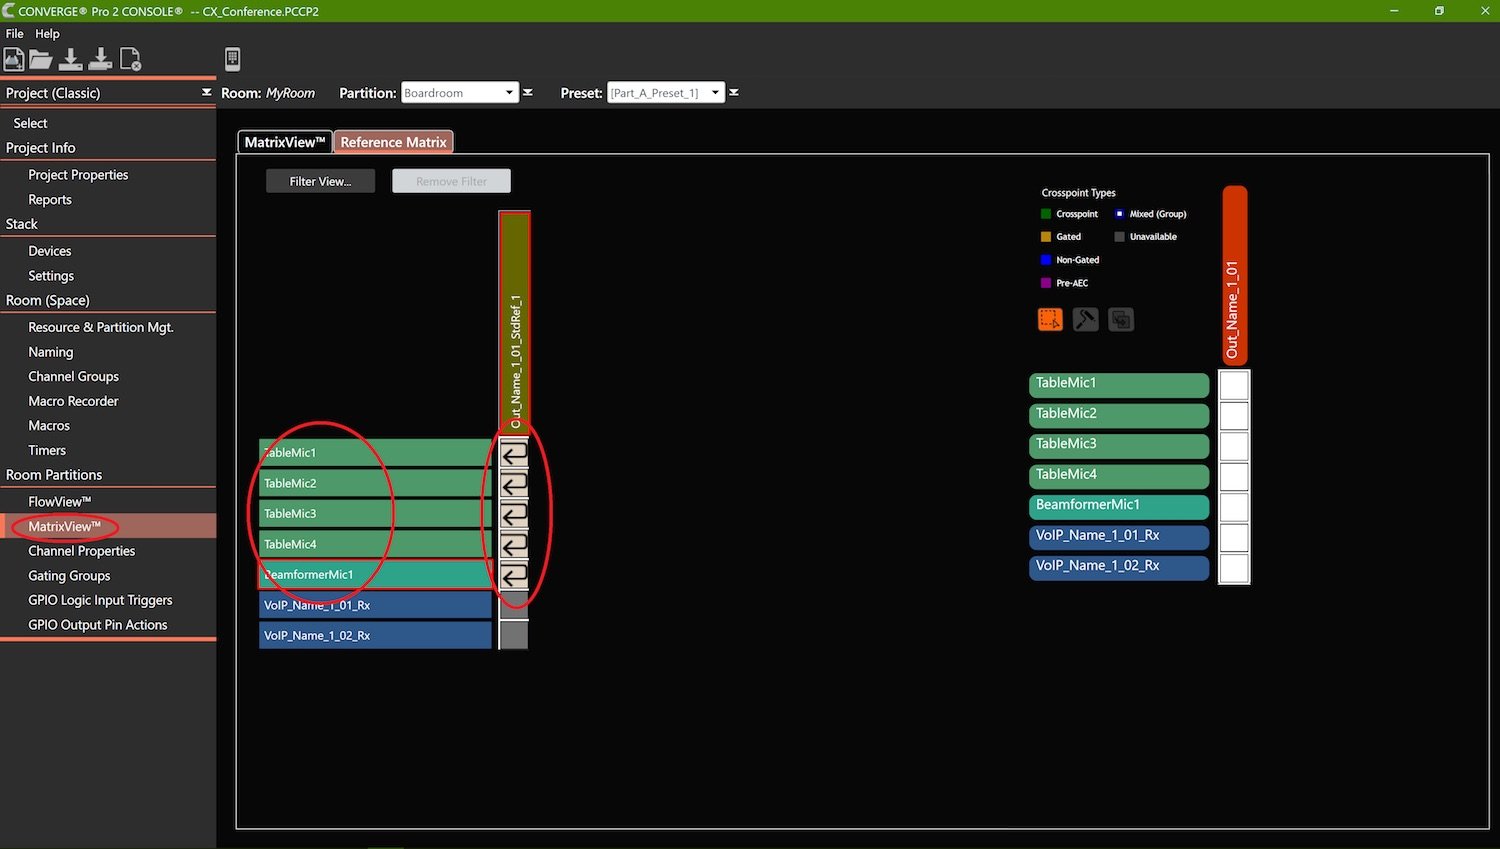
Figure 2
Configure a Custom Reference
A microphone must use a Custom Reference when its audio is routed to this output, i.e. when the mic is being reinforced into the same room for voice lift.
1. Go to the MatrixView. Select the tab Reference Matrix.
2. Add an arrow for each microphone that will need to use this AEC reference.
3. Add an X on each mic input who’s audio must be excluded from the reference. For any mic whose audio is routed to this output that mic’s audio must be excluded from the reference. Otherwise there will be self-referencing, where the AEC will try to suppress all of the mic’s audio.
Any mic that is not reinforced can use a separate Standard Reference. Or that mic can use this same Custom Reference.
EXAMPLE 1
In this example all mic inputs are routed directly to the line output. For this reason, the audio from all mic inputs must be excluded from this reference.
See Figure 3 below
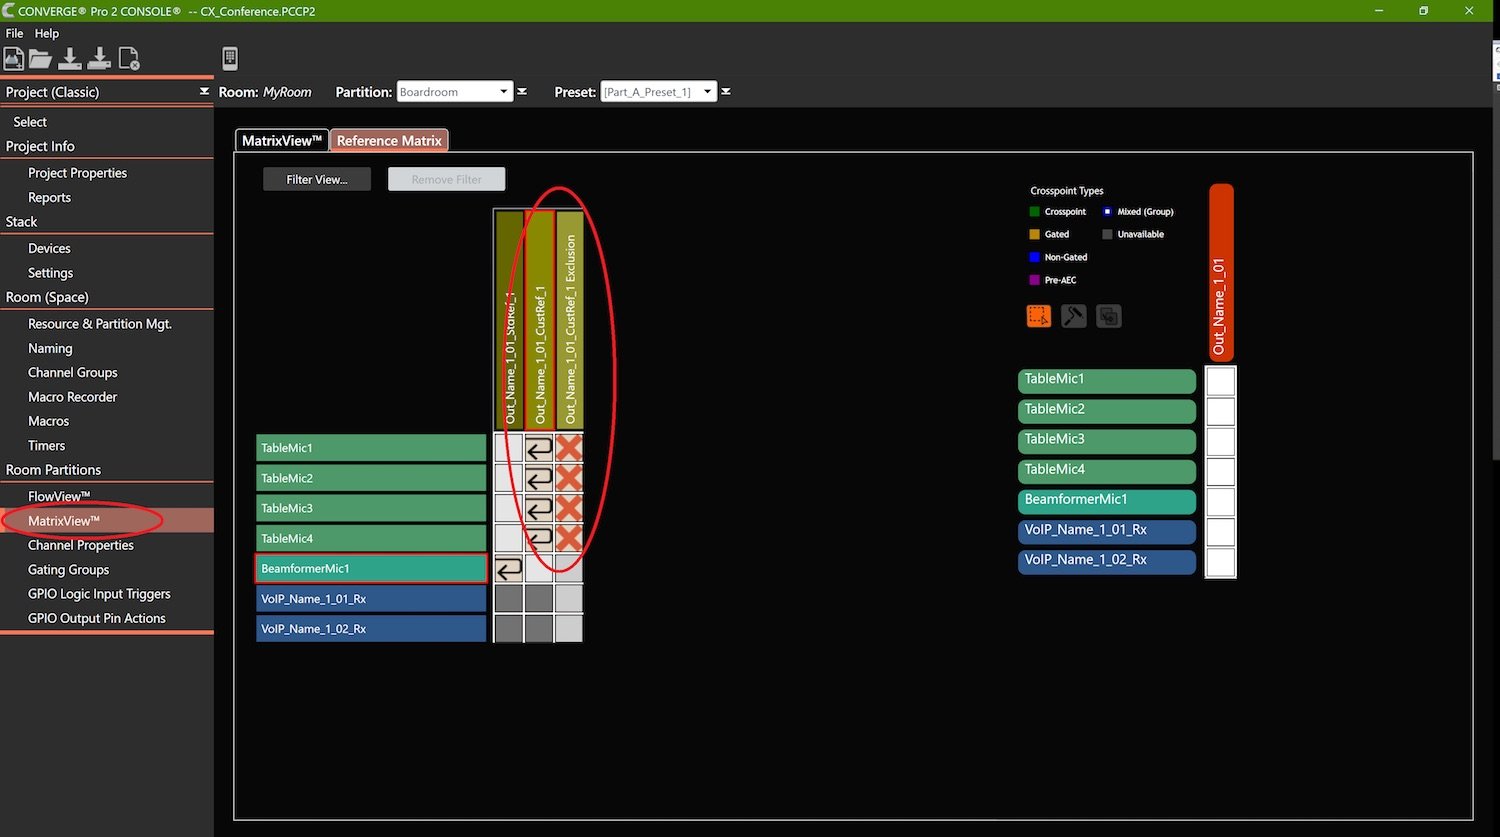
Figure 3
![]()
This article first appeared in the print edition of CX Magazine June 2018, pp.36-37. CX Magazine is Australia and New Zealand’s only publication dedicated to entertainment technology news and issues. Read all editions for free or search our archive www.cxnetwork.com.au
Subscribe
Published monthly since 1991, our famous AV industry magazine is free for download or pay for print. Subscribers also receive CX News, our free weekly email with the latest industry news and jobs.
Recent posts


Latest jobs