News
27 Jun 2019

Astera Control

Subscribe to CX E-News
HOW TO
Astera Control
by Thor Andre, ULA Group.
We have all been there before; mid bump-in and presented with a fixture we have never used before, and we must make it work. Usually, this entails connecting it to the console of your choice using a DMX cable, patching the fixture in to your console, addressing the fixture, and off we go. But what about when there is a whole range of different ways to control said fixture? Some that are proprietary and not used by any other manufacturer. Then what? That is what this guide is for.
It is very likely that you have already come across Astera’s range of battery lights. If you haven’t used the fixtures yet, I suspect you might have heard about them and the app that can be used to control them. This unique app is what we are going to focus on for the most part in this article. But as that is only one of many ways to control the fixtures, I will give a quick overview of the other options.
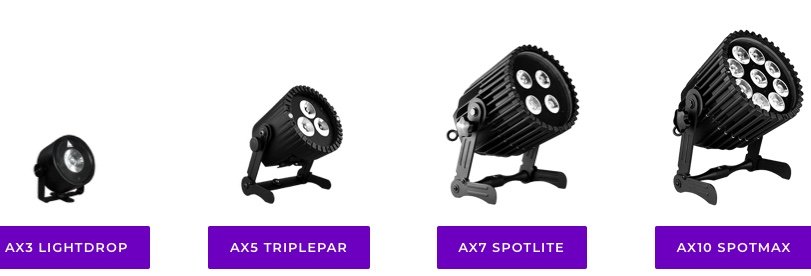
First we should describe the range of fixtures. It is a compact range:


LED Pars. Three different sizes. AX3 15W RGBW CREE LED – 13° Beam Angle, AX5 45W RGBAW (3x 15W) – 13° Beam Angle & AX10 135W (9 x 15W) RGBAW – 13° Beam Angle. All units in the range are IP65, with 20hr runtime battery life, and have a useful selection of accessories.
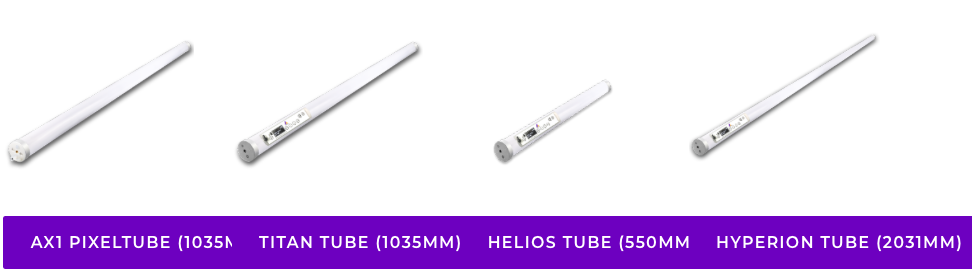
LED Tubes. Currently three different versions. (Soon to be four) AX1 PixelTube 28W RGBW LEDs – 180° Beam Angle, FP1 TitanTube 72W RGBMA LEDs – 120° Beam Angle, FP2 HeliosTube (60cm version of the Titan) and the next one to be introduced, HyperionTube, a 2m version of the TitanTube.
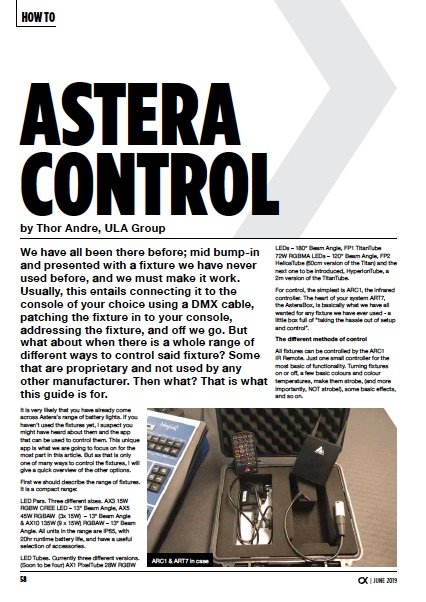
For control, the simplest is ARC1, the infrared controller. The heart of your system ART7, the AsteraBox, is basically what we have all wanted for any fixture we have ever used – a little box full of “taking the hassle out of setup and control”.
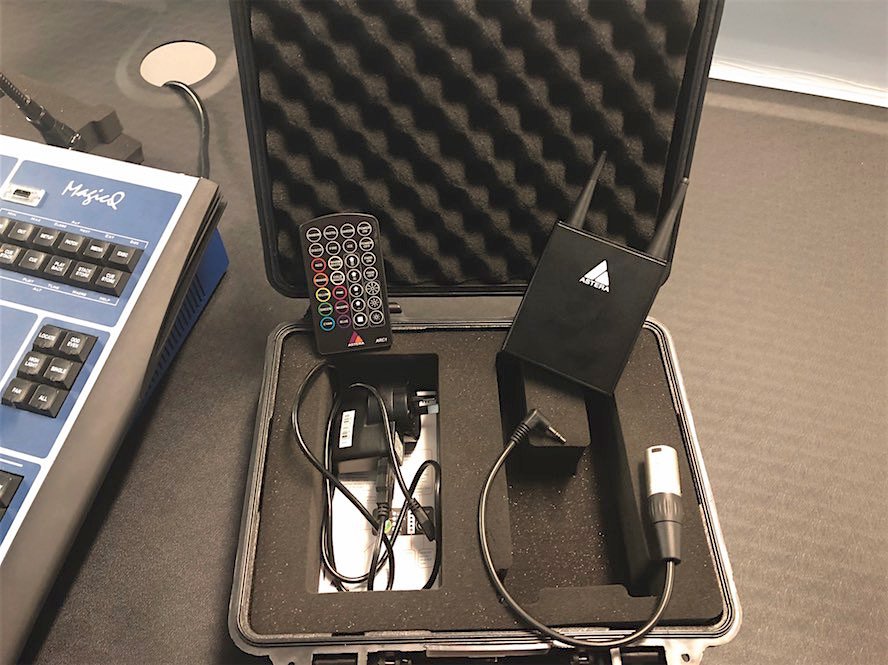
ARC1 & ART7 in case
The different methods of control
All fixtures can be controlled by the ARC1 IR Remote. Just one small controller for the most basic of functionality. Turning fixtures on or off, a few basic colours and colour temperatures, make them strobe, (and more importantly, NOT strobe!), some basic effects, and so on.
Wireless DMX. All Astera fixtures have built in Lumen Radio Wireless receivers. This means they will pair up with any Lumen Radio transmitter, and with Wireless Solutions W-DMX transmitters, up to and including G4. Chances are if you have wireless DMX transmitters in your inventory, they will work with the Astera fixtures.
Wired DMX. This isn’t for all the fixtures, only for the newest ones, the AX5 LED Par as well as the Titan, Helios and Hyperion tubes. The AX5 has 5pin XLRs on board. For the tubes, you run DMX to the PSU/Charger and the data interpolates onto the power cable to the fixtures.
ArtNet & sACN. This is only for the newest tubes; Titan, Helios and Hyperion. It works the same way as the wired DMX for these fixtures. You run ArtNet or sACN to the network port of the PSU/Charger and it interpolates the data onto the power cable to the fixtures.
As this is control technology that we are all familiar with, I’m not going to dive any deeper into it. So, let’s move on to the Astera App.
The app is available for both iOS and Android, but not Windows mobile, and will work on phones and tablets. If you haven’t already, I recommend you download the latest version.
There is currently one version for iOS, and an official version and Beta version for Android. The Beta is safe, and you will love the extra functionality. Once installed, the look and feel of the apps are the same, regardless of the OS you are on.
The AsteraBox consists of two parts; the Astera part that connects via Bluetooth to your phone or tablet and has a bi-directional link with the fixtures on the UHF band. Region can be set in the app and will change the frequency to make sure you are always legal, so one box is safe to use all over the world if you travel a lot.
The second part of it is a “free” Lumen Radio transmitter. It even comes with an adapter cable to connect it to your console. Once you open the app, the first thing you want to do is connect to the AsteraBox. The app will prompt you through the process.
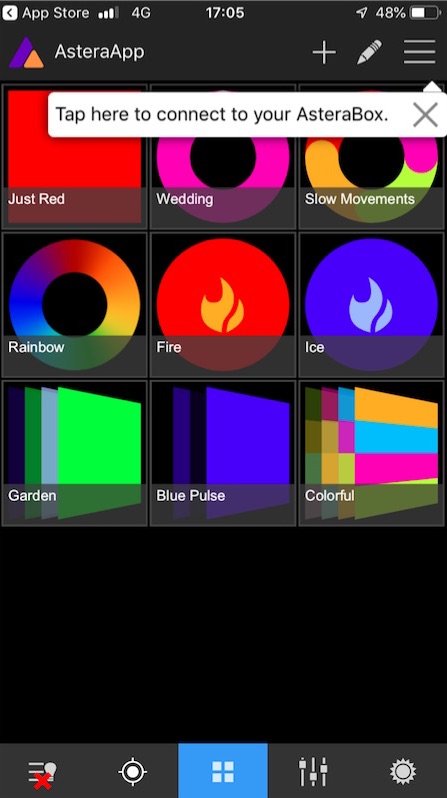
Initial start-up screen
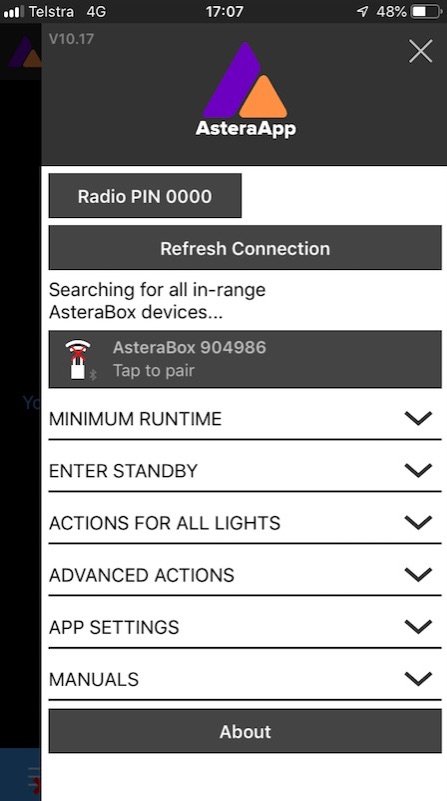
Connection dialogue
Tap the top right corner labelled with three horizontal lines. This opens up the setup screen and allows you to connect to the AsteraBox. You will find the Bluetooth pairing pin on the back of the AsteraBox. You can also set the Radio Pin here, which is a unique pin code to lock the fixtures to the specific AsteraBox.
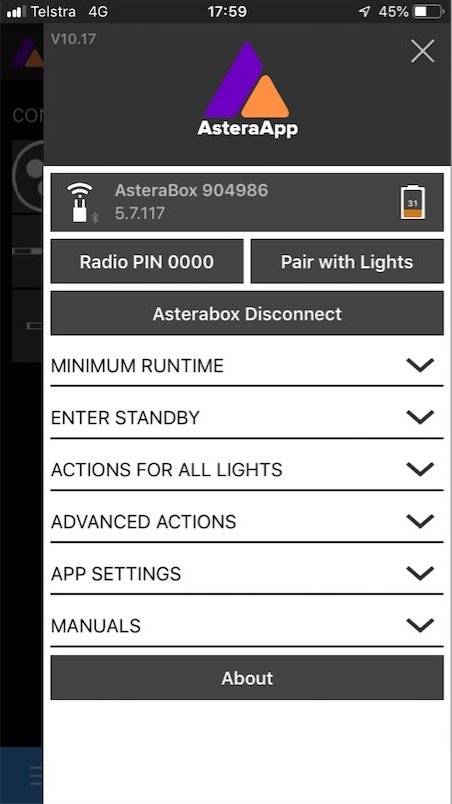
Main Menu
Now you can pair the lights to the AsteraBox.
This process is the same on all the fixtures. Once the fixture is switched on, you press and hold the power button for three seconds until the light starts flashing blue. This is appropriately called “Blue Mode”. The fixture is now ready to pair.
In the same view as mentioned above, you have a button called “Pair With Lights”. You press that and follow the instructions on screen. Once the lights stop flashing, they are paired up with the box. You can now change all the individual settings for the fixtures and control them.
![]()
Here’s an overview of the global settings you have control over here (with most also available on a fixture-by-fixture basis):
Minimum Runtime. This is a unique feature of the Astera fixtures when running them on battery. You set the runtime you want from 2 to 20 hours in one hour increments and the fixtures will automatically throttle the output to accommodate.
Enter standby. To conserve battery, you can put the fixtures in Standby mode. In this mode, the fixtures will only use 5% of the battery life per day. Standby mode can also be scheduled. So you can set out the fixtures in the morning, and set them to turn on at 18:45 for your event that starts at 19:00 and turn off again at 03:00 when the event is over. You do not need to leave your phone or tablet for this to take effect. All the scheduling is done in the AsteraBox. The device is just the interface.
Actions for all Lights
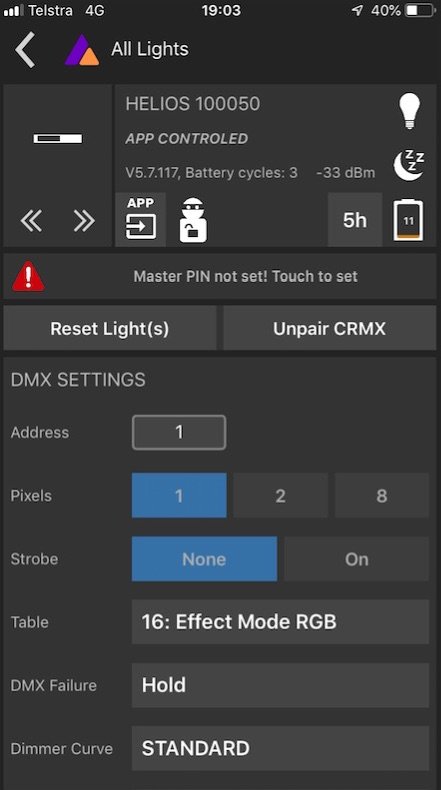
Here you have your DMX Configuration, so you can set the DMX map for all the fixtures, DMX address, what to do on DMX failure and Power failure (if you are running wired). Options are: Blackout, do nothing or emergency light, and your dimmer curve.
Reset Lights / Unpair CRMX allows you to do a global reset to factory default of all the fixtures when they come back from a hire and also unpair from any wireless DMX transmitters, all with the touch of a button instead of manually going into the menu on fixture after fixture to do it.
Theft Alarm On – all the fixtures have a built in accelerometer, so you can set the theft alarm on them. If someone tries to pick them up and run away with them, they will start flashing and beeping. This is usually enough to make someone who is just goofing around put the light back down. But in the event that someone does make off with the light, by the time the battery runs out, the fixture is bricked.
The only way to unbrick it is to re-connect it to the specific AsteraBox it was previously controlled from, or to send it to your nearest service centre, at which point, we will of course be more than happy to return it to its rightful owner.
Advanced Actions
Anti-Flicker – all Astera fixtures use scrambled PWM to drive the LEDs and prevent camera flicker. However, it is also possible to set specific PWM frequencies should you wish to, select your frame rate and the app will work out the PWM frequency for you.
Master Reset Lights – if the fixtures come back from hire and they have been used on different AsteraBoxes, the radio pin won’t match. Using Master Reset Lights will allow you to still do a factory reset on these lights from the app. App Settings.
Talkback+. This is the bi-directional communication between the AsteraBox/app and the fixtures that allows you to monitor things like battery status.
Keep screen On – exactly what is says on the tin; it prevents your device from switching off the screen because you have taken a minute to enjoy the beautiful atmosphere you have created with your lights.
Lights Background Update – there are no more special boxes or adapter cables to update the firmware of your fixtures; it is all done wirelessly via the app and happens in the background, so you can continue to use the fixtures as normal while they are receiving and installing the update.
Show Quickstart – this gives you another run through the hints and tips on how to get going.
AsteraApp Factory Reset – takes you back to square one and deletes any customisation you have done.
Backup & Restore – as with anything show critical, always remember to back up your work. The Astera app also makes it easy to share your backup. Once saved, you can send it via mail, SMS, WhatsApp, WeChat or whatever your preferred platform is.
RF Region – this allows you to change the RF Region you are in if you travel internationally.
UI – User interface. Set to Auto as default, but you can choose Phone or Tablet
Manuals – ever wished you had the manual for the fixtures you are using? Well here they are, all in the app. As an extra bonus, there is a “cheat sheet” for all the RGB values for the full Lee and Rosco libraries, both with a Tungsten and a Daylight source.
Why just RGB when the fixtures use more LED colours? Because it is all calibrated and written into the firmware of the fixtures.
Here’s a tip – when controlling the fixtures via DMX, only ever use RGB as your colour space. The fixtures will then automatically include the other colours as and when needed to maximise colour consistency and light output.
The previous were all global controls. From the fixture list (bottom left hand button on the screen) we can now go into each individual light.

Fixture List
Individual fixture configuration
This gives us the same configuration options as the global app controls, but on a fixture by fixture basis. And it also gives us visibility over the remaining battery life, as well as the charging cycles.
This list can be filtered and sorted on different criteria to give you the overview you need. Everything from fixture type and alphabetical name, to how strong the fixtures receive the wireless signal.
If you’re wondering what the max limit of fixtures that can be controlled on the app is, it’s virtually unlimited. Just be aware that once you start adding more than a thousand fixtures to it, the fixture list will become sluggish and unmanageable. However, at that quantity, you should have moved to a console or a media server anyway.
The next button over is your “Target” or Group button.
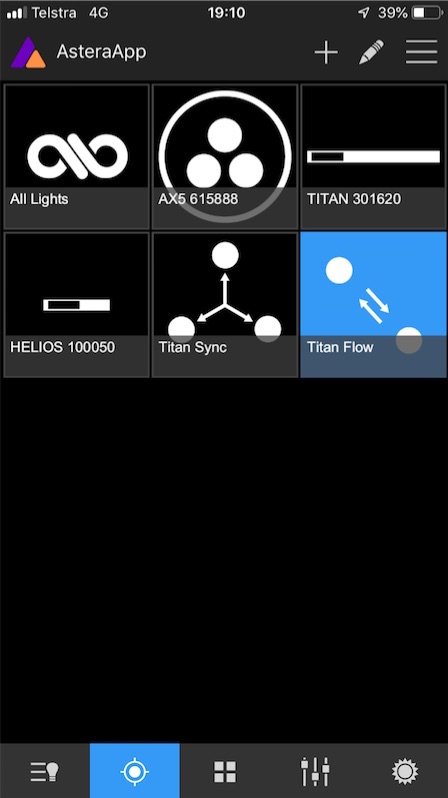
Target/Group view
Here you can create your groups of lights so it is easy to select the ones you want to control. You simply use the “+” and “pencil” symbols at the top to add or edit groups.
There are two types of groups; Sync Sets and Flow Sets. A Sync Set means that all the fixtures in the group do exactly the same thing. A Flow Set turns all the fixtures in that group into “One Giant Fixture” allowing an effect to flow through all the fixtures.
The middle button is the effects. The app comes with a range of predefined effects built in. You can adjust and edit these, and create new ones.
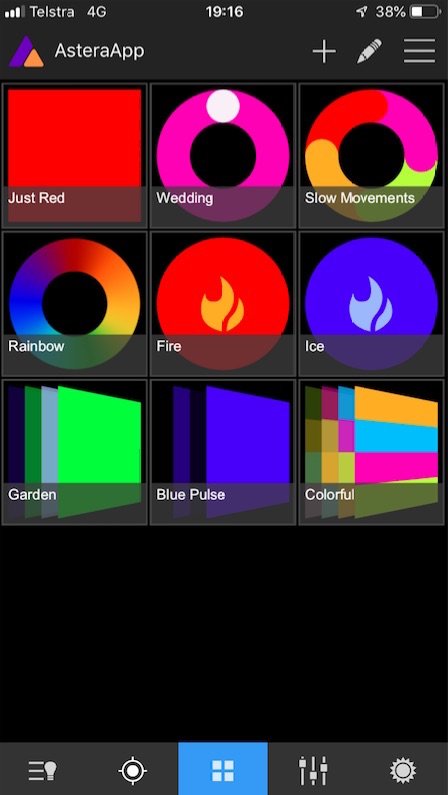
Predefined Effect
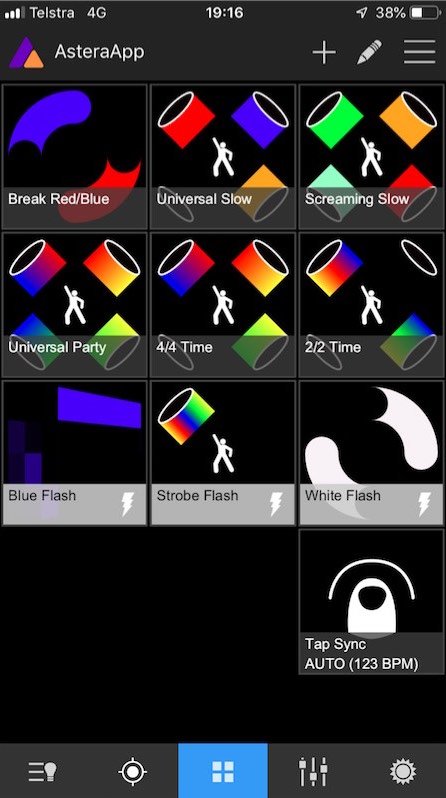
Customisable Effects
For solid colour control, this is your starting point. Select the tile in the top right hand corner that says “Just Red” then select the next button over on the bottom toolbar to open up the effect editor, and press the red box labelled C1.
This now gives you the colour picker with some predefined white colour temperatures as well, and easy access to more options.
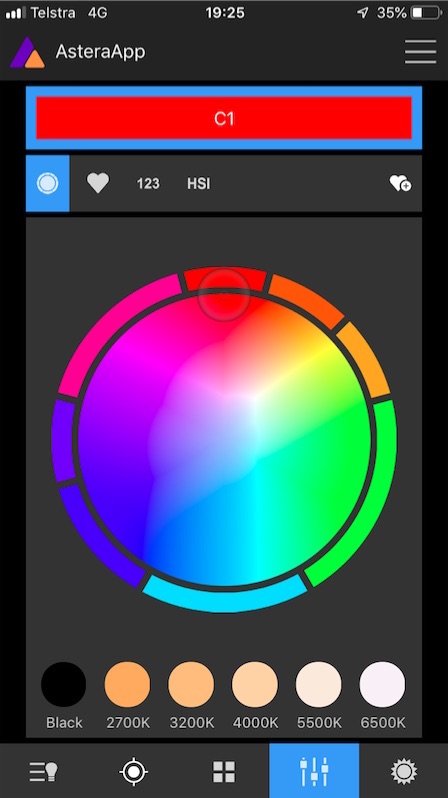
Colour Picker
The “Heart” button is where your favourite colour pre-sets are stored and you can add new ones by pressing the “Heart+” symbol on the right hand side. The “123” button, gives you full Lee and Rosco libraries with bothTungsten and Daylight source.
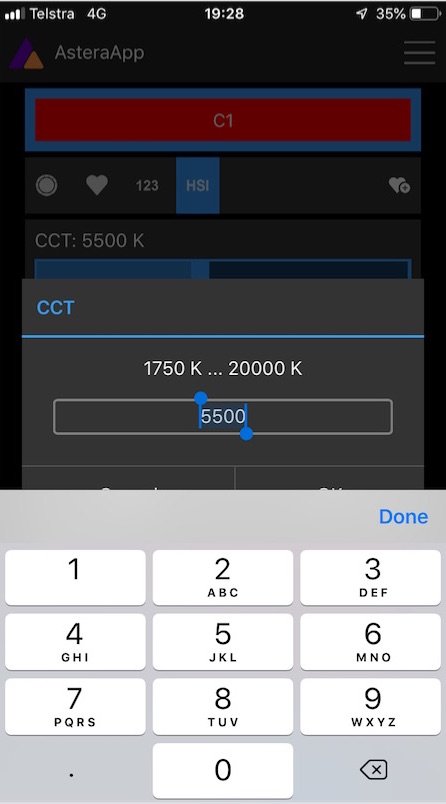
And the “HIS” button gives you HIS control. It also gives you full colour temperature control as well as +/- Green control, and you can double tap the sliders to type in the value you want.
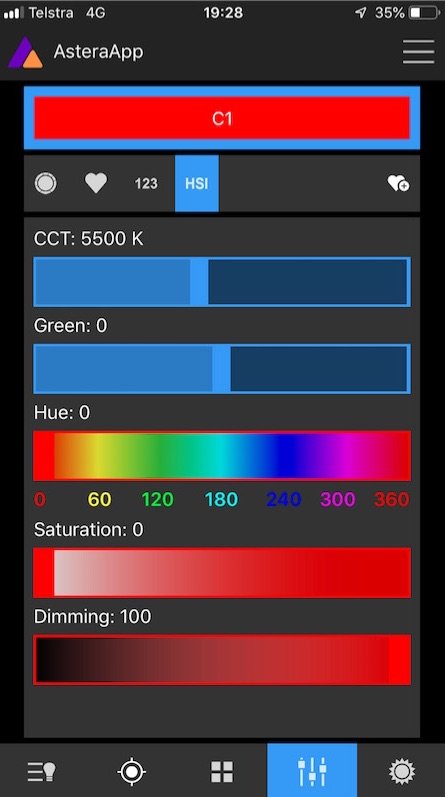
HSI
+/- Green Control
The last button on the bottom toolbar gives you access to the Grand Master and the sub masters for the groups you have created.
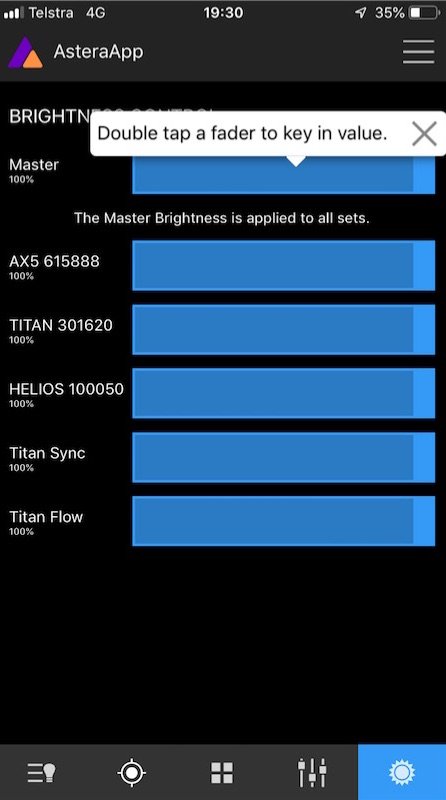
Grand Master & Sub Masters
If you want to learn more, visit www.astera-led.com to check out the manuals. Even better, reach out to your friendly local ULA Group rep and tell them you would like a proper demo and we will be more than happy to go through it all with you.
CX Magazine – June 2019 Entertainment technology news and issues for Australia and New Zealand – in print and free online www.cxnetwork.com.au
© CX Media
Subscribe
Published monthly since 1991, our famous AV industry magazine is free for download or pay for print. Subscribers also receive CX News, our free weekly email with the latest industry news and jobs.
Recent posts


Latest jobs