News
16 Oct 2018

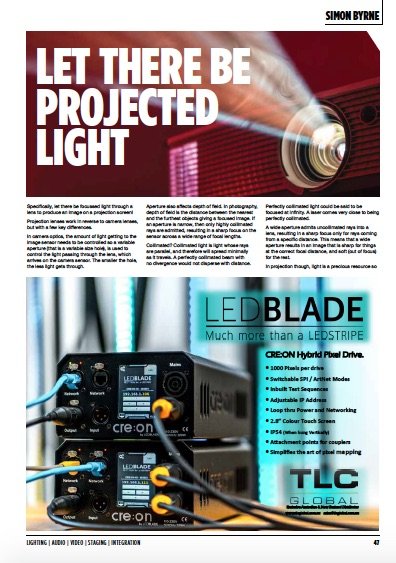
Let There Be Projected Light
Subscribe to CX E-News
Simon Byrne
Let There Be Projected Light
by Simon Byrne.
Specifically, let there be focussed light through a lens to produce an image on a projection screen!
Projection lenses work in reverse to camera lenses, but with a few key differences. In camera optics, the amount of light getting to the image sensor needs to be controlled so a variable aperture (that is a variable size hole), is used to control the light passing through the lens, which arrives on the camera sensor. The smaller the hole, the less light gets through.
Aperture also affects depth of field. In photography, depth of field is the distance between the nearest and the furthest objects giving a focused image. If an aperture is narrow, then only highly collimated rays are admitted, resulting in a sharp focus on the sensor across a wide range of focal lengths.

Collimated? Collimated light is light whose rays are parallel, and therefore will spread minimally as it travels. A perfectly collimated beam with no divergence would not disperse with distance. Perfectly collimated light could be said to be focused at infinity. A laser comes very close to being perfectly collimated.
A wide aperture admits uncollimated rays into a lens, resulting in a sharp focus only for rays coming from a specific distance. This means that a wide aperture results in an image that is sharp for things at the correct focal distance, and soft (out of focus) for the rest. In projection though, light is a precious resource so we are usually trying to get the maximum amount of light onto the screen. Consequently, projection lenses are used at wide open aperture so as to deliver an acceptably bright image.
Fortunately in projection, we are not worried about a deep depth of field.

 The projected image out of a projector is usually derived from a DLP or LCD chip, which is a flat plane, and you are usually projecting on a screen which is also a flat plane, so there is no need for any depth of field. The notable exception is projection onto 3D objects but we’ll get to that soon.
Fixed lenses (sometimes called prime lenses) are typically sharper, have better edge focus with more light throughput, and are usually cheaper. They are easier to build, have less design compromises and components. Generally speaking, you are always better off using a fixed lens if your installation permits it. However, the real world often does not permit fixed lenses, so most projector lenses have a zoom range.
These lenses have more glass elements, as well as moving parts. They are harder to make, so dollar for dollar, they will not pass as much light, nor focus quite as well as a fixed lens. Despite this, the benefits of zoom lenses overcome these shortcomings because they are so flexible.
Projection distance is a primary factor in producing a quality image. Within reason, the longer the projection throw relative to the screen size, it will produce a more evenly sharp, consistent brightness image with less keystone. There are a few things going on.
Keystone error, is caused by tilting the projector up, down, or to either side of the projection screen’s optical centreline. At this point, the plane of the screen is not parallel to the plane of the projector, and an uneven, trapezoidal image results, rather than a rectangle.
You can correct keystone distortion two ways. The first is to make sure the projector’s lens is parallel to the screen surface in both the horizontal and vertical planes. Physical keystone correction is always better than electronic. However, this may not be possible, so that is the time you use electronic correction within the projector or an external pixel mapping device which will still deliver acceptable results, albeit with slightly uneven focus. But keystone error is less with a long lens. Using a long throw lens of say 4:1 throw ratio, the projection distance is four times larger relative to the screen width. Therefore any errors in geometry will be small relative to the image.
In very simplistic terms, the keystone error will be the screen size divided by the projection distance, so that is reduced to 25%. However, if you have a very short lens, say a 08:1, keystone errors will actually be increased as the projection distance is less than the screen size, so that the error becomes amplified to 125%.
A medium to long projection throw will also produce sharper results across a building. Because buildings are 3D, a depth of field exists. With a longer projection throw, the light is more collimated which means it can accommodate better a variable depth projection surface, and any geometry errors will be less due to the long projection throw.
Short lenses still have their uses where a short throw is the only option such as some boardrooms or rear projection. It just becomes more critical to have the geometry absolutely spot on. Otherwise keystone and even focus will suffer.
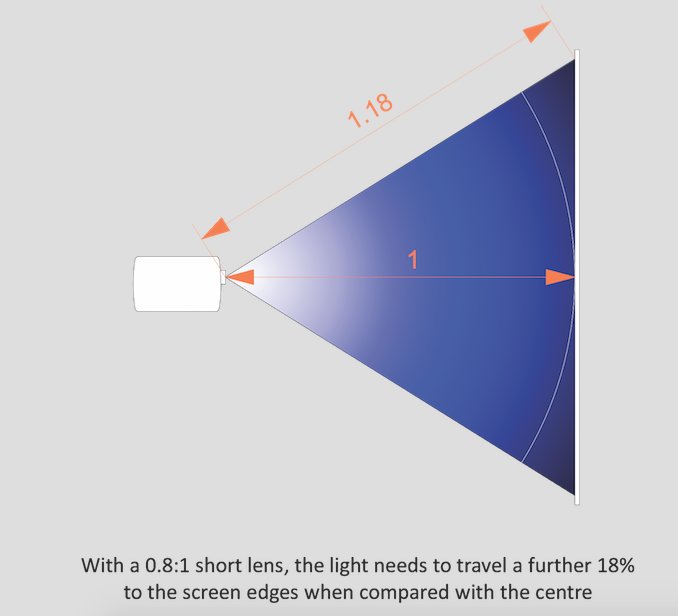
Short lenses that pass large amounts of light are hard to make too. The tolerances are so much finer, particularly at the edges of the image. This is because, relatively speaking, over the short projection distance, the light is spread widely to the image edges. This means it is bent a lot optically, and has to travel further than the light in the centre of the image.
Using our 08:1 lens example, the light at the edges has to travel about 18% further than to the centre, so that means brightness at the edges will suffer due to the extra distance travelled, as well as the extra optics at the lens edges to accommodate the different focal length (the extra 18% edge distance).You can sometimes see this as a hotspot in the centre of the image, especially with rear projection.
By way of comparison, using a 4:1, the difference in light distance travelled between the centre and edges is less than 1% so brightness and focus will be very even. The sweet spot for lenses is the mid range zoom. About 1.3:1 to around 2.4:1. Fairly cheap to make, good light output, but without the issues that come with short lenses and the cost of long lenses. Most projectors are shipped with a mid range zoom lens and as long as you can work within the zoom range, deliver perfectly acceptable results.
There will always be compromises to be made when selecting projection lenses. Ideally you want your image to be pure as possible right throughout the signal chain. That means get the optics right before employing any electronic trickery to overcome optical problems. Pixel mapping comes at a cost in that you lose resolution, focus at the edges suffers, as will light output.
This article first appeared in the October 2018 edition of CX Magazine – in print and online. CX Magazine is Australia and New Zealand’s only publication dedicated to entertainment technology news and issues. Read all editions for free or search our archive www.cxnetwork.com.au
© CX Media
Want to read more about Projection? October’s CX Magazine features these other projection-themed articles:
Creative Projection Mapping with TDC’s Pete Lynn
Antartica – While You Were Sleeping
Choosing the Best Projector
Technology Engages Students in Learning
From Projector to Plate – Encore Serve up a Sensory Feast
3D Modular Panels for Projection Mapping
Borderless Projection in the Age of LED
Video Projection History – The Talaria
Simon Byrne: Let There Be Projected Light
Duncan Fry: Snow Job – The Projector from the Smithsonian
Subscribe
Published monthly since 1991, our famous AV industry magazine is free for download or pay for print. Subscribers also receive CX News, our free weekly email with the latest industry news and jobs.
Recent posts


Latest jobs